CP/M Due
This is a CP/M v2.2 computer. It uses a Z80 emulator, and runs on an Arduino Due.
How to build the application
Building the application is easy. Simply get a copy of CPM_Due, open the .ino file in the Arduino IDE, compile it, and load it on your Arduino Due or Digistump DigiX HW. Note that in order to build applications you'll need Arduino 1.5 or higher to support the ARM processor on the Due/DigiX. I've been using 1.5.6-r2.
To create the disk image you'll need to follow the directions in the tools/avrcpm/z80 directory to create a floppy disk onto an SD card.
Plug the SD card into the HW and 'boot' the application to get CP/M running.
How to build the HW
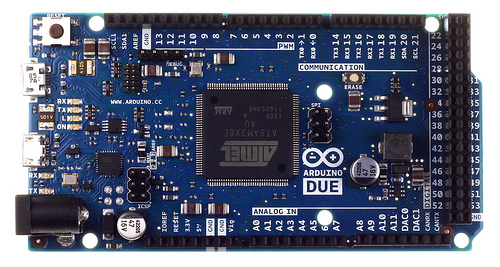
You'll need an Arduino Due in order to run this application. The reason is the Due is powerful enough with an 84MHz ARM Cortex-M3 to emulate a Z80 at full speed, and has enough built in RAM to support 64K of RAM (even though this distribution of CP/M is built for 62K).
But wait, the Due doesn't have a place to put an SD card. Yup. You'll need to wire in your own SD card adaptor. When you go looking for one be mindful that the Due doesn't have the same pinout as an Uno, and most SD card shields won't work with the Due.
To build mine I used an SD card breakout board from Adafruit, and prototyping shield from NKC Electronics (I got mine from Amazon). It allowed me to also add other HW to the 'machine' which was nice.
An alternative shield is available from SainSmart, and it works fine if all you want is the SD adaptor for a Due. It's simple and convenient.
If you prefer an all-in-one HW solution you can also use the DigiX. It has a built-in SD card reader as well as WiFi! (but unused on this project). It would be really cool if someone(?) got WiFi working with CP/M, but that's for another time.

How to create disk images
Creating the disk images is a little tricky. Here's how I did it with OS X.
OS X
Use the instructions in the 'readme.txt' file to create the CP/M image on an SD Card. It uses some Terminal commands so you'll have be be comfortable with doing that.
If you don't have cpmtools already installed you can easily get them using Homebrew. Once you have that just type:
$ brew install cpmtools
Be warned! when you finally get to the point of copying the CP/M image to the sd card be carefull to note the volume name for the card. That might mean you have to modify the `Makefile` to change the path. Don't blindly run `make` or you might overwrite something important!
Connecting the HW to a terminal for user I/O
Once you have the application loaded, the image written to an SD card, and connected to the HW, the last thing you need to do is connect to a terminal emulation program. For this project I've mostly used CoolTerm because first, it's free, and second it has just about all the features you need. In the application preferences set the serial speed to 19200 8n1. Check the box to handle the backspace character, and the terminal bell.
Connecting the HW to the computer is fairly simple. Use a USB cable to connect the Due to the computer and select that connection inside CoolTerm.
If you have a DigiX board it's a little more complicated because there's only only one USB connection to the board, and it's used for programming. Switching between the Arduino IDE and CoolTerm is tedious so I connected a USB to serial adaptor to RXTX0 (pins 0 and 1) on the DigiX. **BE WARNED!** the DigiX (and Due) can only tolerate 3.3V on the I/O. Only use a serial adaptor that has a 3.3V output. I found a handy one by SunFounder on Amazon that has a switch selectable 3.3V and 5V output.
Where to find this project
This project is hosted on GitHub as ptcryan/CPM_Due. Feel free to contribute as much as you like!
Version history
* R2014-07-06: First official version.
* Will boot into CP/M. Stable. Runs MS-Basic and Zork I. Supports Arduino
Due and Digistump DigiX.
Copyright (C) 2014 David Ryan (ptcryan)

This work is licensed under a Creative Commons Attribution-ShareAlike 4.0 International License.